Overview
Single sign-on (SSO) services enable you to manage your team’s identity across all your SaaS products and you can use this functionality to manage authentication to the Dashboard. With an SSO service, a user can access multiple applications using one set of credentials (for example, an email address and password). The SSO service authenticates the user once for all the applications the user has been given rights to and eliminates further prompts when the user switches applications during the same session. An example of SSO is Google’s sign-in implementation for products like Gmail, YouTube, and Google Drive. Any user signed in to one of Google’s products is also automatically signed in to their other products.SSO Setup for SAML
The identity provider (IdP) must support the SAML 2.0 standard. Today, Okta is the only supported IdP.
Okta
To configure Single Sign-On (SSO) with Okta, you need to create a custom SAML application. Additionally, you must be an administrator in Okta and have anOwner role in your Knot Dashboard to set up SSO for your team.
Configuring SSO using a custom SAML app
To continue configuring your custom SAML application, do the following:1
Open Okta
Open your Okta admin console in a new tab.
2
Navigate to Applications
Go to “Applications” and then select “Applications.”
3
Create an app integration
Select “Create App Integration.”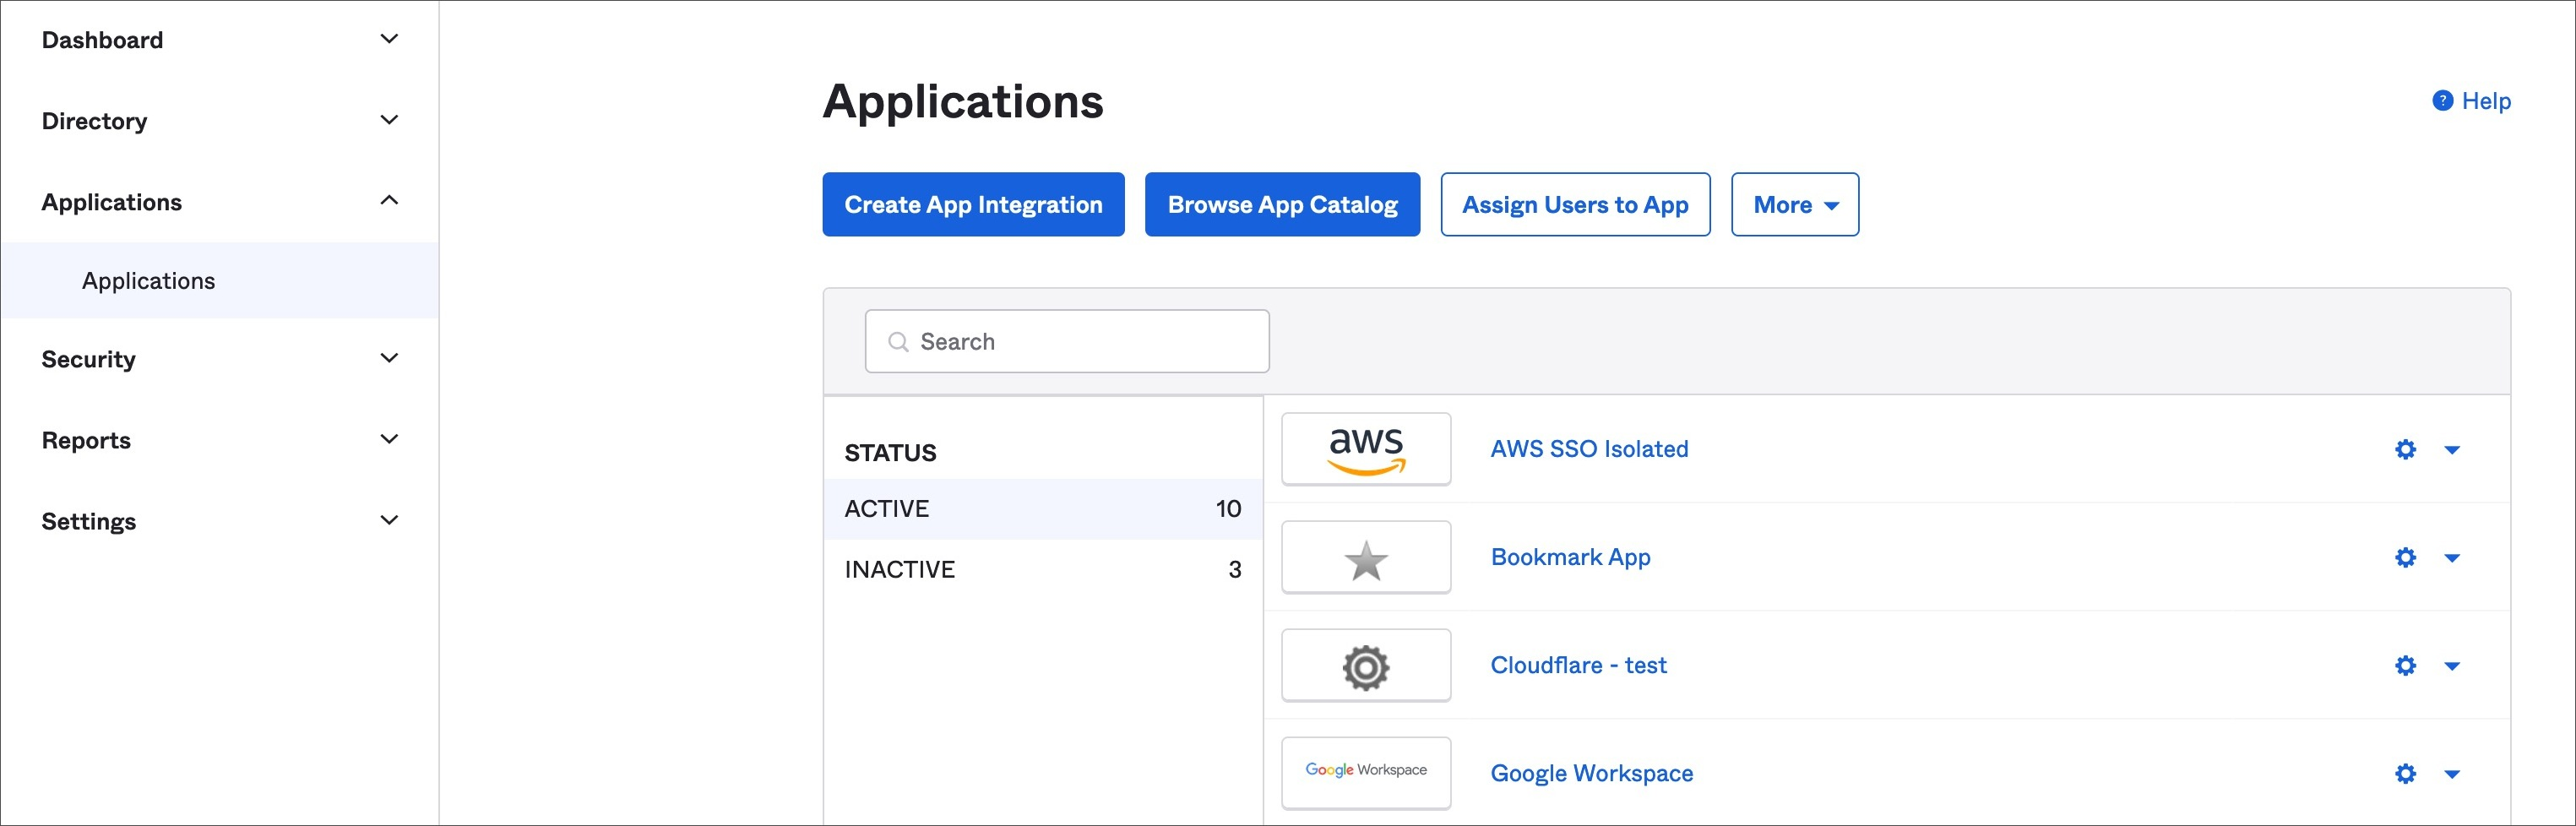
4
Select SAML 2.0
In the “Create a new app integration” screen, select “SAML 2.0” and then select “Next.”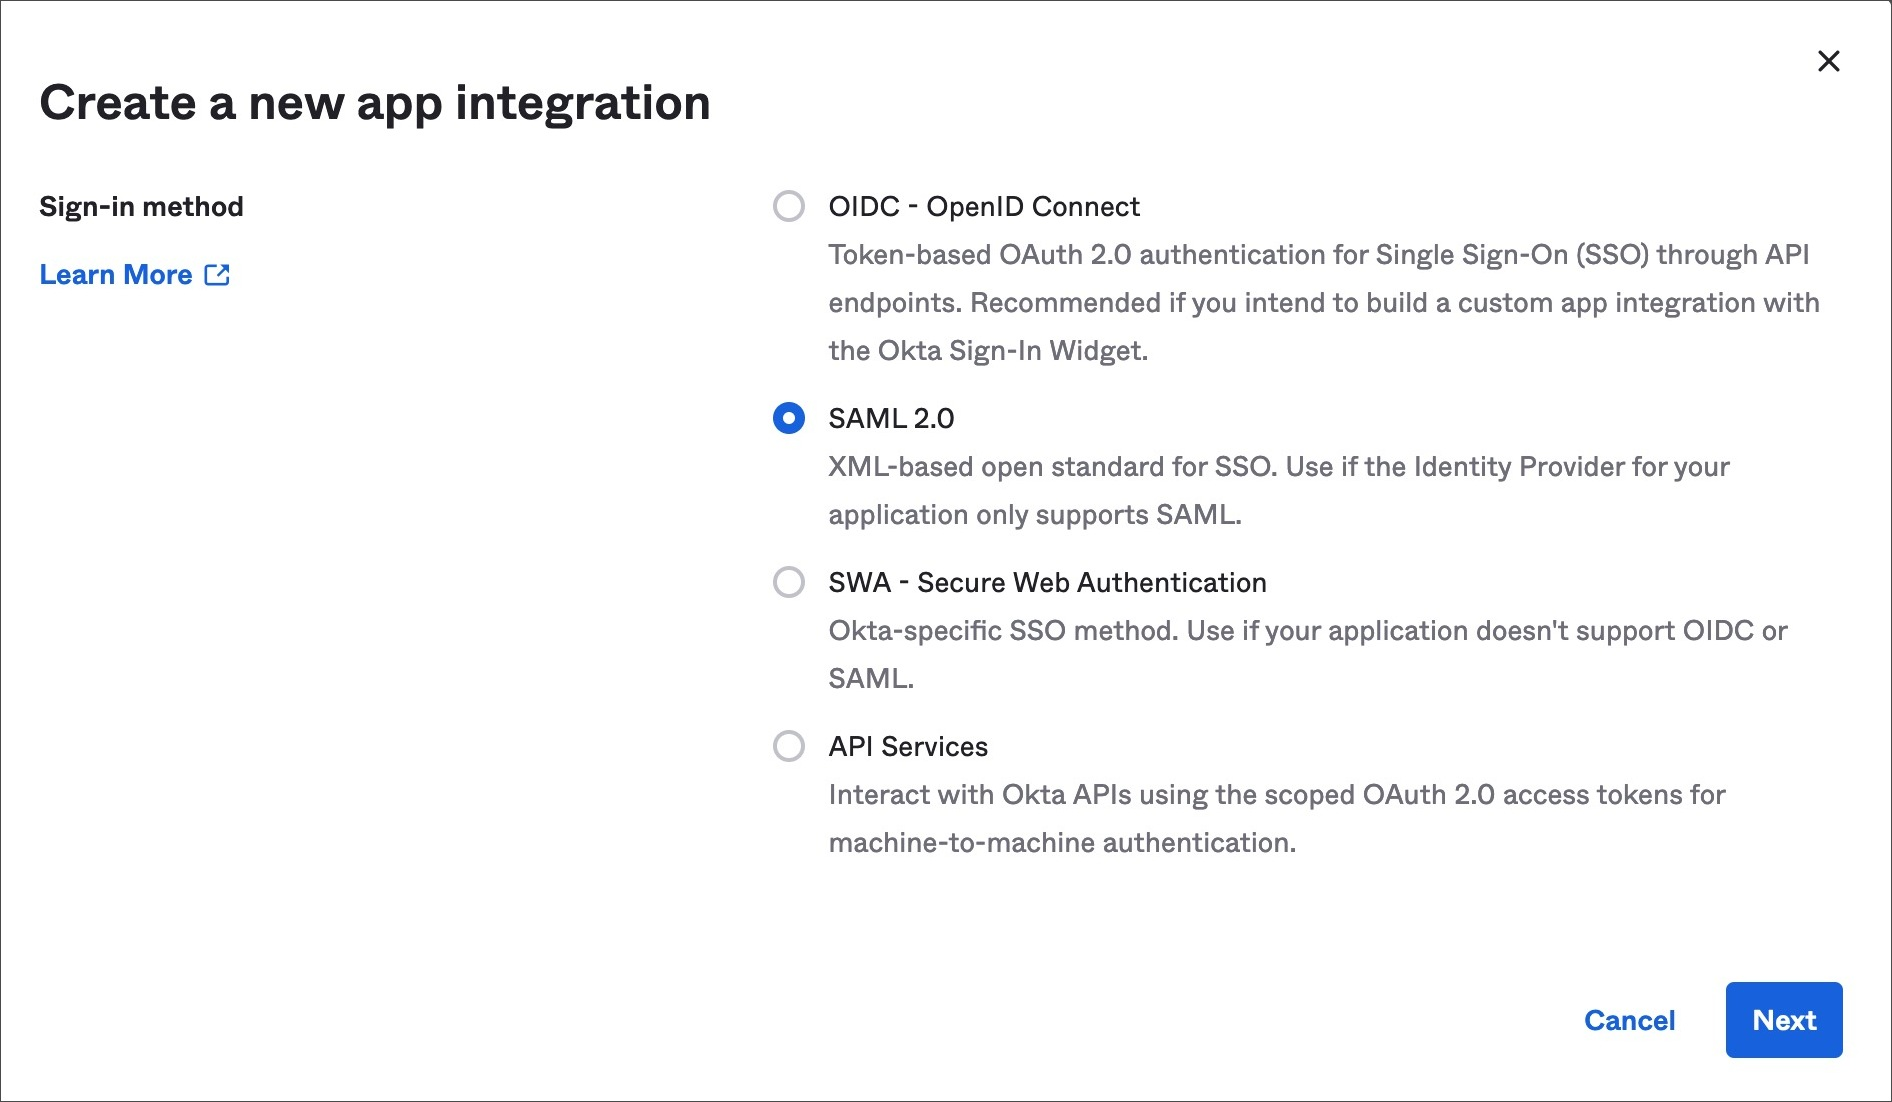
5
Choose an app name
In the “General Settings” tab, enter an app name you’ll recognize later, and then select “Next.”
6
Specify the SSO URL
In the “Configure SAML” tab, specify https://dashboard.knotapi.com as the “Single Sign-On URL” and use it as your “Audience URI (SP Entity ID).” Choose “Email Address” as the “name ID” format.
7
Specify the app as internal
In the “Feedback” tab, select “I’m an Okta customer adding an internal app.” Select “This is an internal app that we have created” as the app type, and then select “Finish.”
8
Find the setup instructions
Select the “Sign On” tab, and then select “View SAML setup instructions” to display the “IdP details.”
9
Login to the Knot Dashboard
Login to the Knot Dashboard with an
Owner role and navigate to the “Account” page.10
Complete the SAML/SSO form
Based on the IdP details you got in Step 8, fill in the form with the following details
- Entity ID -> Identity Provider Issuer
- Login URL and Logout URL -> Identity Provider Single Sign-On URL
- X509 Certificate -> X509 Certificate
11
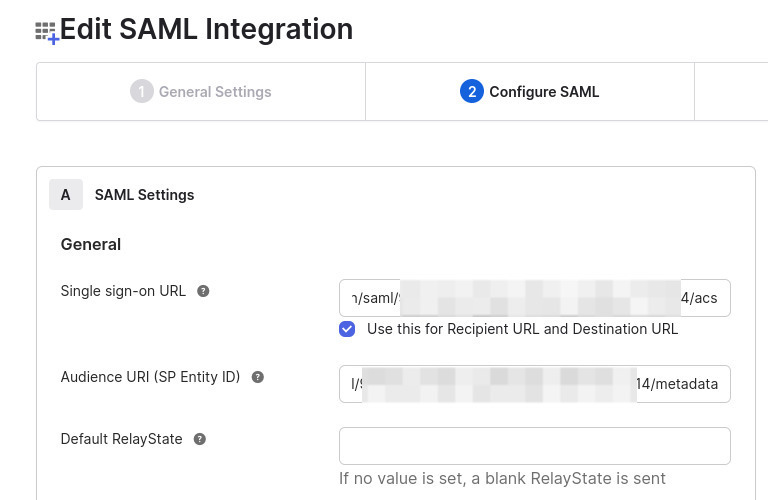
Update the SAML settings in Okta
Navigate to the custom SAML application in Okta, click “Edit,” and update the SAML settings using the configuration generated in the prior step. The “Single Sign-On” is the “Reply URL” and the “Audience URI (SP Entity ID)” is the “Entity ID.”